Building a Physically Accurate 3D Floorplan for Smart Home Control
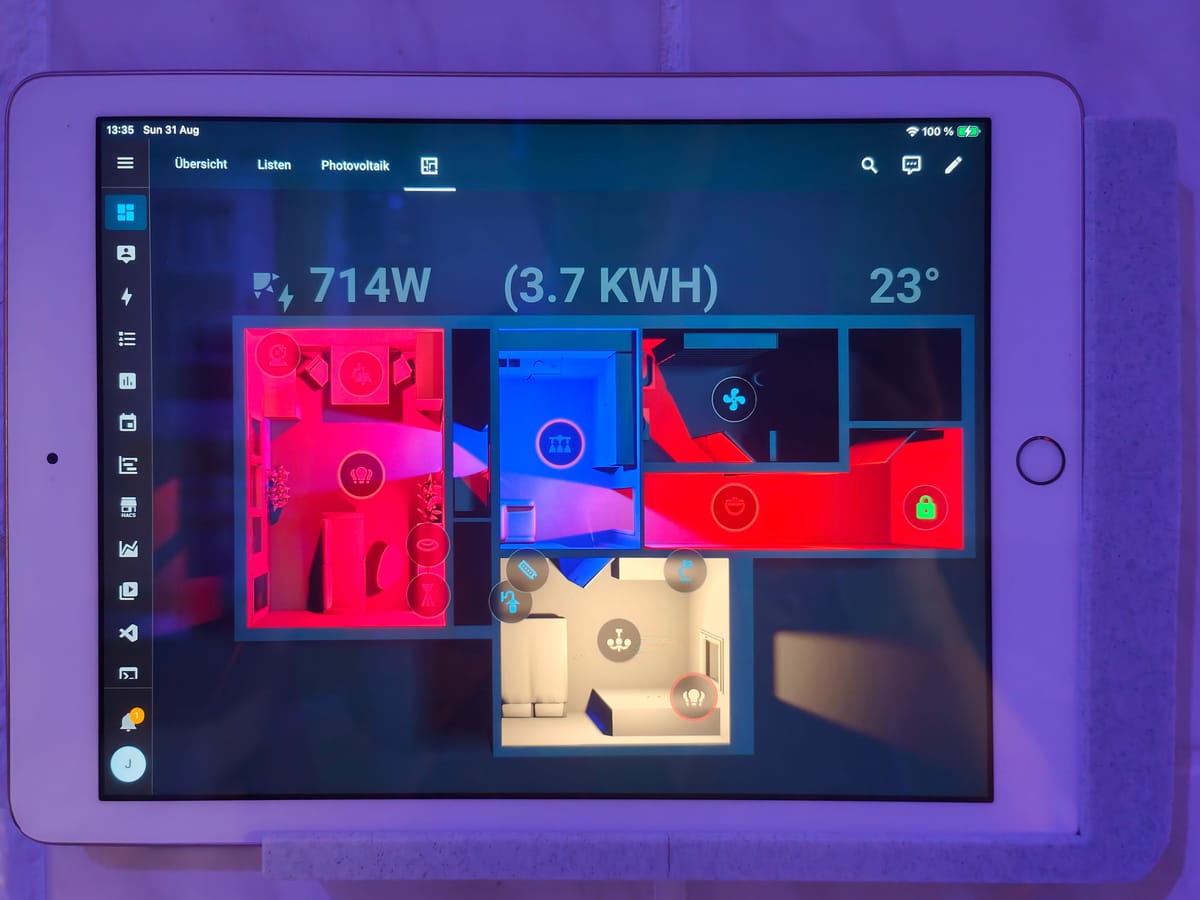
In this post, I'll explain how we can create a dynamic 3D floorplan where the lights on the dashboard mimic their real-world counterparts in color, brightness, and even how their light realistically blends together like a digital twin. For example, a red light and a blue light will correctly blend to create a magenta glow on the floorplan.
Additive Lighting with Image Layers
Instead of just showing or hiding an icon, we will layer multiple images on top of each other. We will start with a dark base image of our floorplan. Then, for each light in our home, we will have a corresponding image layer that shows only the light cast by that single lamp. By dynamically changing the opacity, brightness, and color of these individual layers and blending them together, we can simulate the combined effect of all the lights in a room. The foundation of our dashboard in Home Assistant will be the picture-elements card, set to a "Panel" view.
Before we can do anything in Home Assistant, we need our visual assets. I chose the free software Sweet Home 3D for this task.
- Build the Model: Using your home's architectural floorplan as a guide, model your rooms, walls, and significant furniture (sofas, kitchen cabinets, tables, etc.). These objects help with orientation. I deliberately left the ceiling out of the model to create a clear top-down view.
- Neutralize the Scene: This is a critical step. To ensure our rendered lights accurately reflect their intended color, we must remove all other color information from the model. Set the color of all walls, floors, and assets to pure white.
- Place the Lights: We need to add a lamp in the 3D model for every physical smart light in our home. We should position them as accurately as possible. I recommend to configure these lights to emit a neutral white light.
Once we're happy with the model, we need to find a camera position that gives a good overview of all the important areas. The camera position should be fixed. It is essential that the camera position and angle do not change for the entire rendering process.
The "One-Hot" Rendering Process
We are going to render a separate image for each lighting condition.
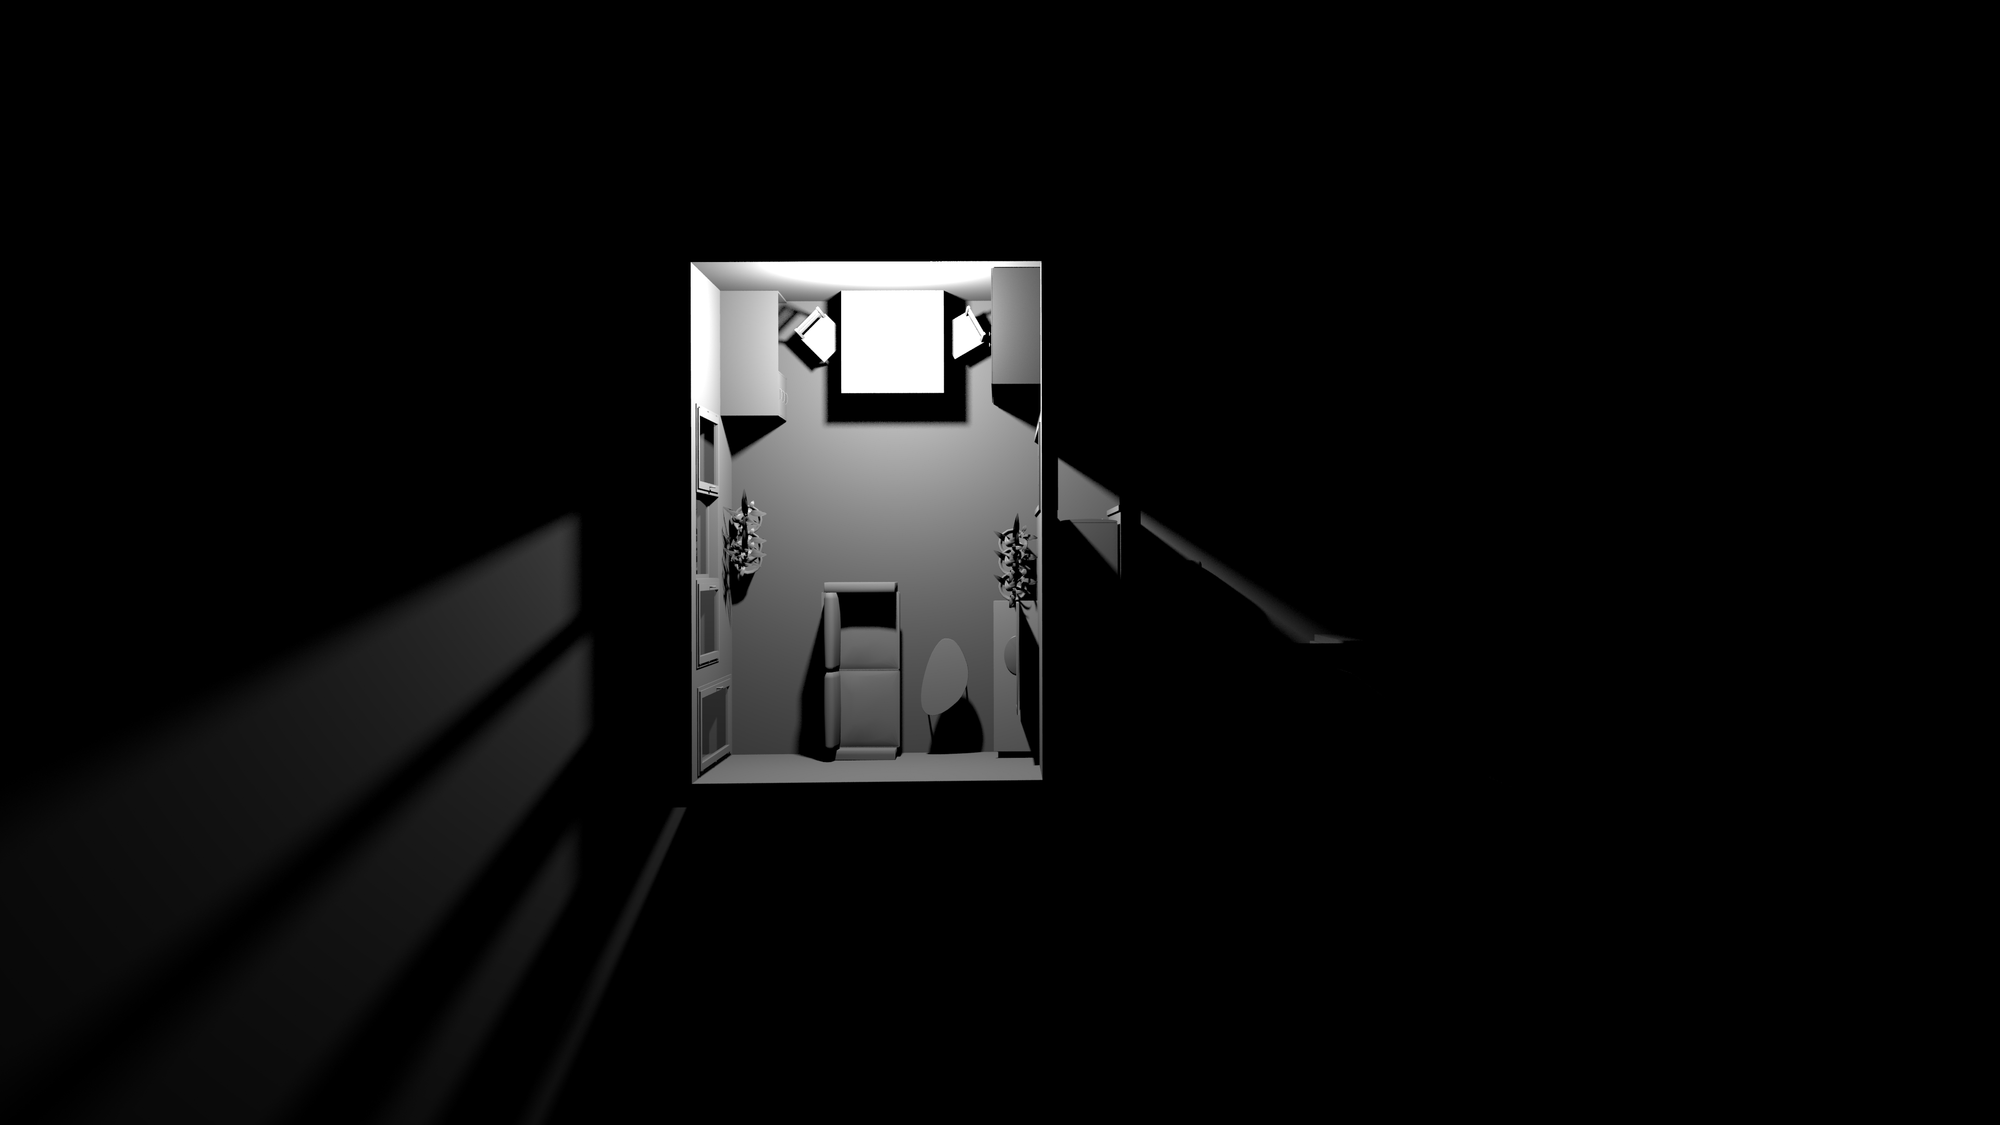
The Base Image (All Lights Off): We need to turn off every single light in our 3D model. To avoid a completely black scene, we set the time to midnight and place a couple of very large, dim, and distant light sources far away from the model. This creates a faint, even illumination that reveals the outlines of the rooms. For my personal taste, I took this base render into Photoshop and added a subtle blue tint. This will be our background.
Individual Light Renders: Now, we follow this "one-hot" sequence:
- Turn on only one light in the model (e.g.,
light.living_room_ceiling). - Render the scene and save it (e.g.,
living_room_ceiling.png). - Turn that light off.
- We repeat this process until we have one unique image for every single light we want to control (or plan in the future to control).
At the end of this process, we should have one base image and a collection of individual light-mask images. We upload all of them to our Home Assistant server in a web-accessible directory, like /config/www/floorplan/.
Floorplan Setup in Home Assistant
Now, we assemble everything in a picture-elements card. The structure is simple: the base image is defined first, and then every light layer is added as an image element on top of it.
The real power comes from using the card-mod integration to apply CSS styles dynamically based on the state of our lights.
type: image
entity: light.living_room_ceiling
image: /local/floorplan/living_room_ceiling.png
style:
  top: 50%
  left: 50%
  width: 100%
  transform: translate(-50%, -50%)
card_mod:
  style: |
    :host {
      mix-blend-mode: lighten;

      /* Hide the layer by default */
      opacity: 0;
      filter: brightness(0);

      /* Smooth transitions */
      transition: all 0.5s ease-in-out;
    }
The image layer is positioned to perfectly overlay the base image. The most important property here is mix-blend-mode: lighten;. This CSS rule dictates that where this layer overlaps with others, the colors are additively combined, not just stacked. This is how we achieve realistic light blending.
Now, let's make it dynamic. We add a Jinja2 template inside the style block to change the CSS when the light is on.
    {% if is_state('light.living_room_ceiling', 'on') %}
      :host {
        /* Make the layer visible */
        opacity: 1;

        /* Adjust brightness based on the light's attribute */
        filter: brightness({{ state_attr('light.living_room_ceiling', 'brightness') | int(0) / 255 }});
      }
    {% endif %}
When the light is turned on, we set the opacity to 1, which makes it visible. We also dynamically set the CSS brightness filter by pulling the light's brightness attribute (a value from 0-255) and scaling it to a 0-1 range.
But what about color? Our rendered images are all white. We can tint them with an ::after pseudo-element:
  :host::after {
      content: "";
      position: absolute;
      top: 0; left: 0;
      width: 100%; height: 100%;
      background-color: transparent;
      mix-blend-mode: multiply; /* This tints the white light render */
      transition: background-color 0.5s ease-in-out;
    }

    {% if is_state('light.living_room_ceiling', 'on') %}
      :host {
        /* ... (opacity and brightness from before) ... */
      }
      :host::after {
        /* Set the background to the light's actual RGB color */
        background-color: rgb({{ state_attr('light.wohnzimmer_esstisch', 'rgb_color') | join(',') }});
      }
    {% endif %}
This adds a color layer on top of our brightness-adjusted white light render. The mix-blend-mode: multiply; effectively tints the white light with the rgb_color attribute from the entity.
Now we need to repeat this image element block for every one of our lights.
Of course, additional information can also be displayed if desired. For example, I dynamically display a card when a timer has been set, with the remaining time shown in a progress bar. I also display the PV yield and the current outside temperature.
Smart devices that do not belong to the light category (e.g. door lock, fans) can also be displayed in the appropriate location on the dashboard.
Bonus Tip: The Smart Kiosk Display
I run my floorplan on an old iPad mounted to the wall in a custom 3D-printed frame that also charges it with a hidden cable. But I wanted it to be more than just a static display: The screen should only turn on when someone is actively looking at it, not just when they walk through the room.
To achieve this, I used a presence sensor, which allows for more precise detection zones (centimeter level) than a standard motion sensor. I defined a narrow zone directly in front of the iPad. When the sensor detects presence in this specific area, a Home Assistant automation sends a simple "wake up" notification to the iPad using the Companion App.
Here's the clever part: the iPad is locked into the Home Assistant app using iOS's "Guided Access" mode. In this mode, the device's lock screen is disabled. While the notification banner itself isn't displayed in Guided Access, the incoming push notification is enough to wake the screen. The result is a seamless experience: walk up to the display, and it instantly wakes to show the floorplan, ready for interaction, without ever showing a lock screen or a notification bubble. This approach also saves energy, as the iPad display is not continuously on, but only when it is actually being used.